This article is the 9th part of the tutorial series called Node Hero - in these chapters, you can learn how to get started with Node.js and deliver software products using it.
In this tutorial, you are going to learn what is unit testing in Node.js, and how to test your applications properly.
Upcoming and past chapters:
- Getting started with Node.js
- Using NPM
- Understanding async programming
- Your first Node.js server
- Node.js database tutorial
- Node.js request module tutorial
- Node.js project structure tutorial
- Node.js authentication using Passport.js
- Node.js unit testing tutorial [you are reading it now]
- Debugging Node.js applications
- Node.js Security Tutorial
- How to Deploy Node.js Applications
- Monitoring Node.js Applications
Testing Node.js Applications
You can think of tests as safeguards for the applications you are building. They will run not just on your local machine, but also on the CI services so that failing builds won't get pushed to production systems.
You may ask: what should I test in my application? How many tests should I have?
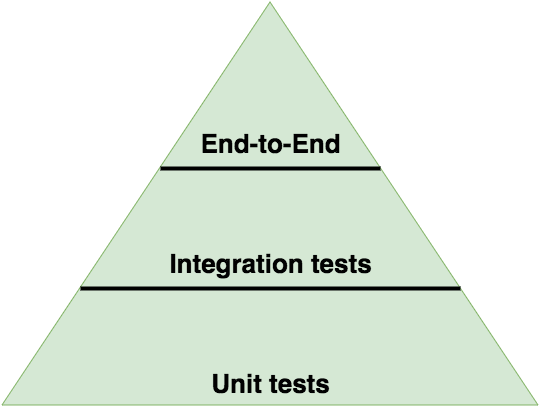
The answer varies across use-cases, but as a rule of thumb, you can follow the guidelines set by the test pyramid.

Essentially, the test pyramid describes that you should write unit tests, integration tests and end-to-end tests as well. You should have more integration tests than end-to-end tests, and even more unit tests.
Let's take a look at how you can add unit tests for your applications!
Please note, that we are not going to talk about integration tests and end-to-end tests here as they are far beyond the scope of this tutorial.
Unit Testing Node.js Applications
We write unit tests to see if a given module (unit) works. All the dependencies are stubbed, meaning we are providing fake dependencies for a module.
You should write the test for the exposed methods, not for the internal workings of the given module.
The Anatomy of a Unit Test
Each unit test has the following structure:
- Test setup
- Calling the tested method
- Asserting
Each unit test should test one concern only. (Of course this doesn't mean that you can add one assertion only).
Modules Used for Node.js Unit Testing
For unit testing, we are going to use the following modules:
- test runner: mocha, alternatively tape
- assertion library: chai, alternatively the assert module (for asserting)
- test spies, stubs and mocks: sinon (for test setup).
Spies, stubs and mocks - which one and when?
Before doing some hands-on unit testing, let's take a look at what spies, stubs and mocks are!
Spies
You can use spies to get information on function calls, like how many times they were called, or what arguments were passed to them.
it('calls subscribers on publish', function () {
  var callback = sinon.spy()
  PubSub.subscribe('message', callback)

  PubSub.publishSync('message')

  assertTrue(callback.called)
})
// example taken from the sinon documentation site: http://sinonjs.org/docs/
Stubs
Stubs are like spies, but they replace the target function. You can use stubs to control a method's behaviour to force a code path (like throwing errors) or to prevent calls to external resources (like HTTP APIs).
it('calls all subscribers, even if there are exceptions', function (){
  var message = 'an example message'
  var error = 'an example error message'
  var stub = sinon.stub().throws()
  var spy1 = sinon.spy()
  var spy2 = sinon.spy()

  PubSub.subscribe(message, stub)
  PubSub.subscribe(message, spy1)
  PubSub.subscribe(message, spy2)

  PubSub.publishSync(message, undefined)

  assert(spy1.called)
  assert(spy2.called)
  assert(stub.calledBefore(spy1))
})
// example taken from the sinon documentation site: http://sinonjs.org/docs/
Mocks
A mock is a fake method with a pre-programmed behavior and expectations.
it('calls all subscribers when exceptions happen', function () {
  var myAPI = {
    method: function () {}
  }

  var spy = sinon.spy()
  var mock = sinon.mock(myAPI)
  mock.expects("method").once().throws()

  PubSub.subscribe("message", myAPI.method)
  PubSub.subscribe("message", spy)
  PubSub.publishSync("message", undefined)

  mock.verify()
  assert(spy.calledOnce)
// example taken from the sinon documentation site: http://sinonjs.org/docs/
})
As you can see, for mocks you have to define the expectations upfront.
Imagine, that you'd like to test the following module:
const fs = require('fs')
const request = require('request')

function saveWebpage (url, filePath) {
  return getWebpage(url, filePath)
    .then(writeFile)
}

function getWebpage (url) {
  return new Promise (function (resolve, reject) {
    request.get(url, function (err, response, body) {
      if (err) {
        return reject(err)
      }

      resolve(body)
    })
  })
}

function writeFile (fileContent) {
  let filePath = 'page'
  return new Promise (function (resolve, reject) {
    fs.writeFile(filePath, fileContent, function (err) {
      if (err) {
        return reject(err)
      }

      resolve(filePath)
    })
  })
}

module.exports = {
  saveWebpage
}
This module does one thing: it saves a web page (based on the given URL) to a file on the local machine. To test this module we have to stub out both the
fs module as well as the request module.
Before actually starting to write the unit tests for this module, at RisingStack, we usually add a
test-setup.spec.js file to do basics test setup, like creating sinon sandboxes. This saves you from writing sinon.sandbox.create() and sinon.sandbox.restore() after each tests.// test-setup.spec.js
const sinon = require('sinon')
const chai = require('chai')
beforeEach(function () {
this.sandbox = sinon.sandbox.create()
})
afterEach(function () {
this.sandbox.restore()
})
Also, please note, that we always put test files next to the implementation, hence the
.spec.js name. In our package.json you can find these lines:{
"test-unit": "NODE_ENV=test mocha '/**/*.spec.js'",
}
Once we have these setups, it is time to write the tests itself!
const fs = require('fs')
const request = require('request')

const expect = require('chai').expect

const webpage = require('./webpage')

describe('The webpage module', function () {
  it('saves the content', function * () {
    const url = 'google.com'
    const content = '<h1>title</h1>'
    const writeFileStub = this.sandbox.stub(fs, 'writeFile', function (filePath, fileContent, cb) {
      cb(null)
    })

    const requestStub = this.sandbox.stub(request, 'get', function (url, cb) {
      cb(null, null, content)
    })

    const result = yield webpage.saveWebpage(url)

    expect(writeFileStub).to.be.calledWith()
    expect(requestStub).to.be.calledWith(url)
    expect(result).to.eql('page')
  })
})
The full codebase can be found here: https://github.com/RisingStack/nodehero-testing
Code coverage
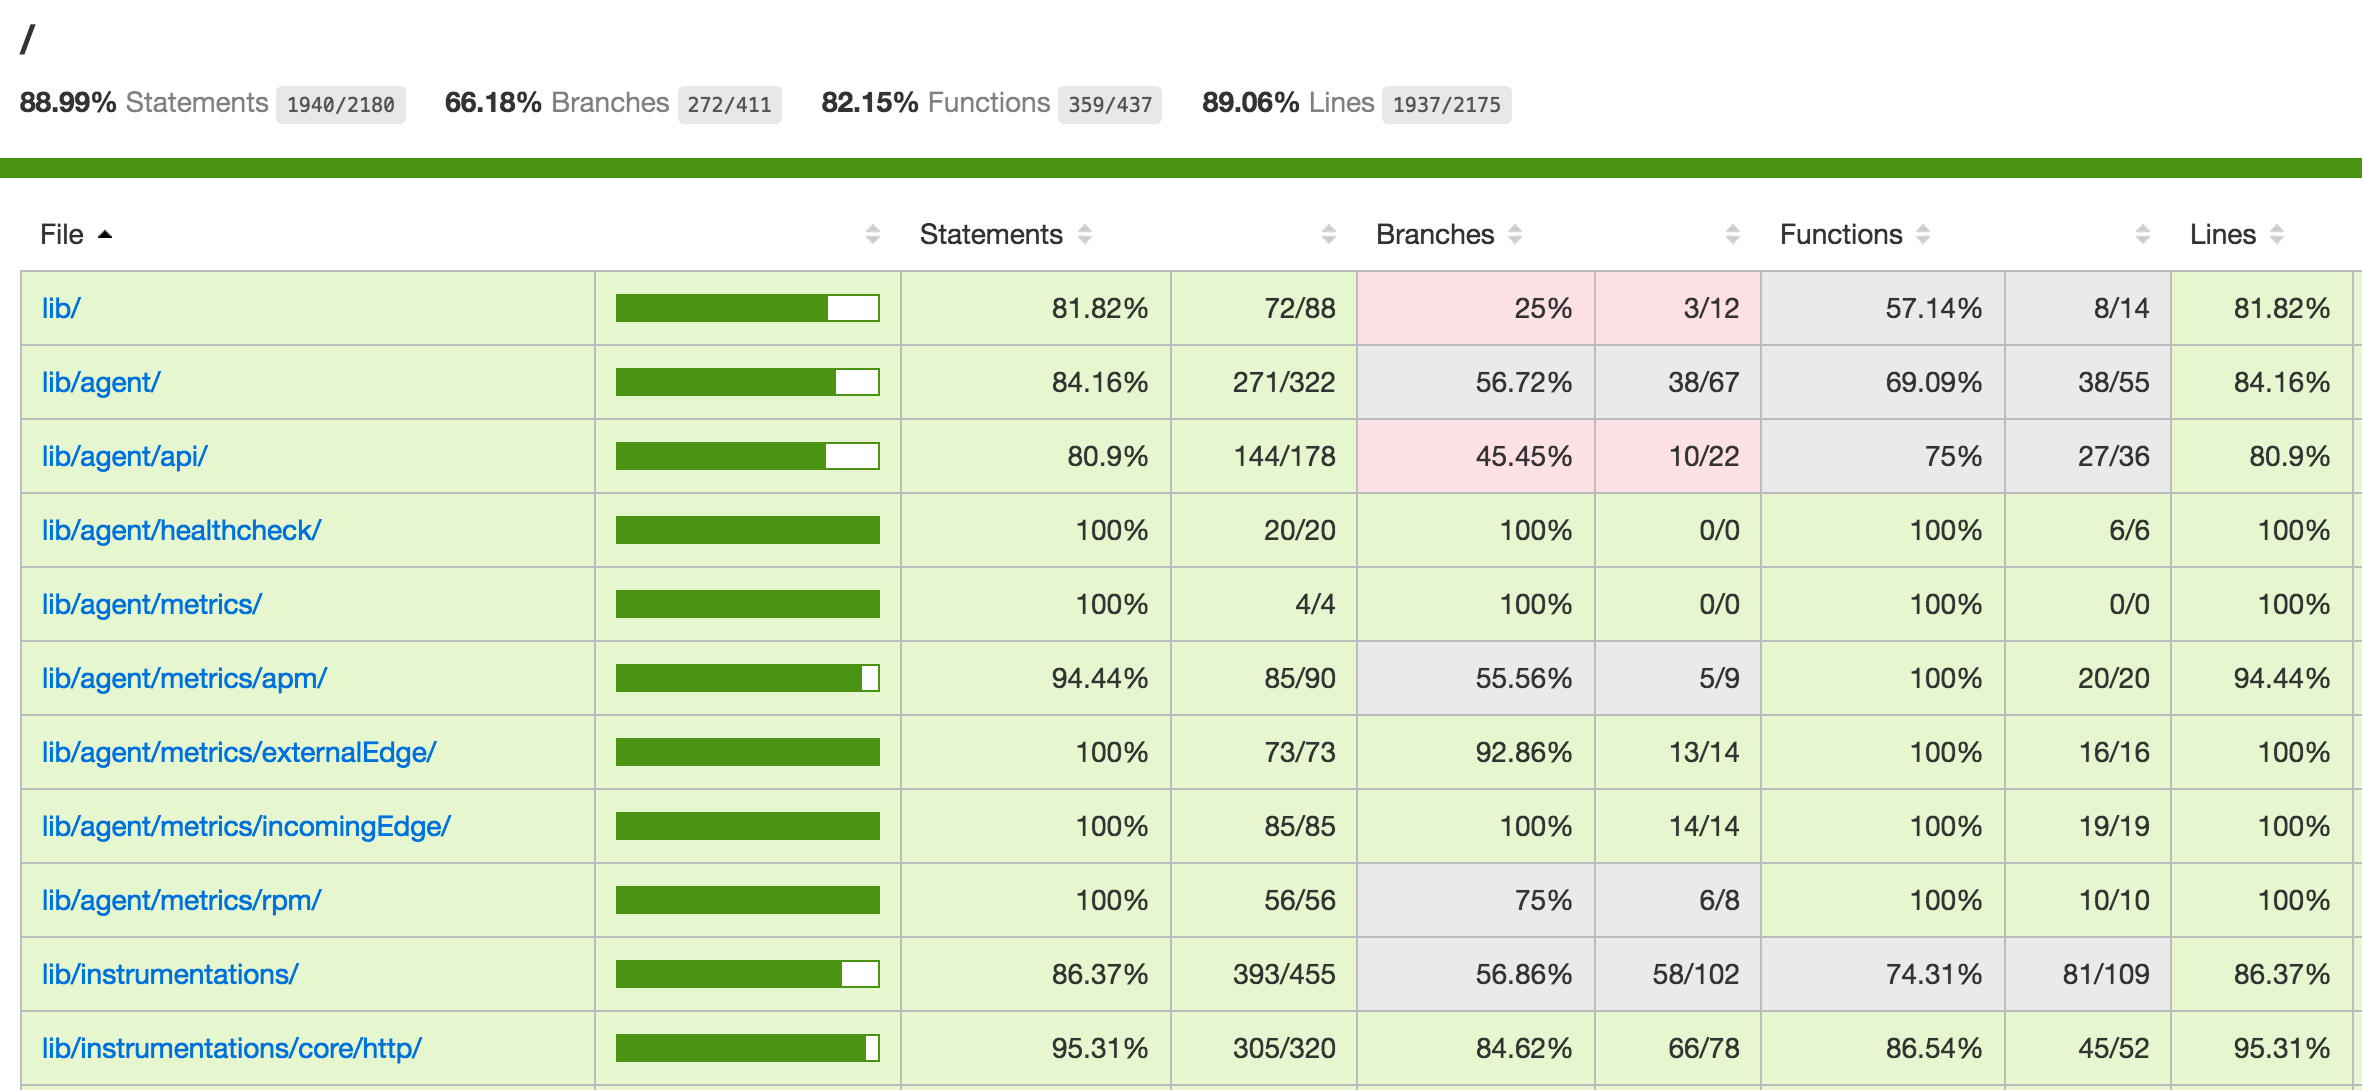
To get a better idea of how well your codebase is covered with tests, you can generate a coverage report.
This report will include metrics on:
- line coverage,
- statement coverage,
- branch coverage,
- and function coverage.
At RisingStack, we use istanbul for code coverage. You should add the following script to your
package.json to use istanbul with mocha:istanbul cover _mocha $(find ./lib -name \"*.spec.js\" -not -path \"./node_modules/*\")
Once you do, you will get something like this:

You can click around, and actually see your source code annotated - which part is tested, which part is not.
No comments:
Post a Comment